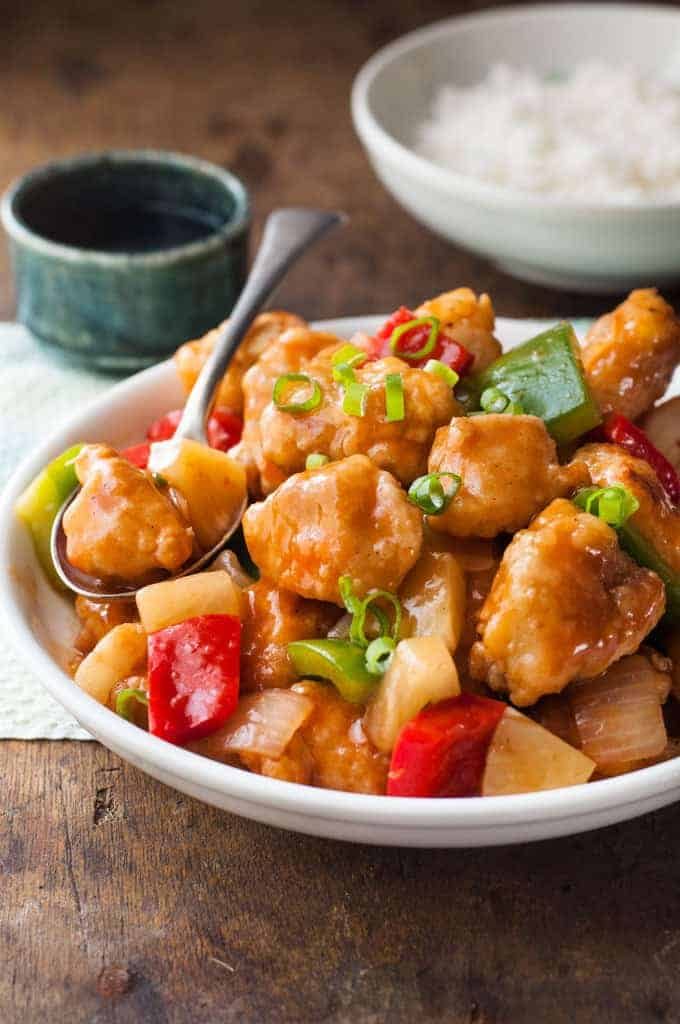
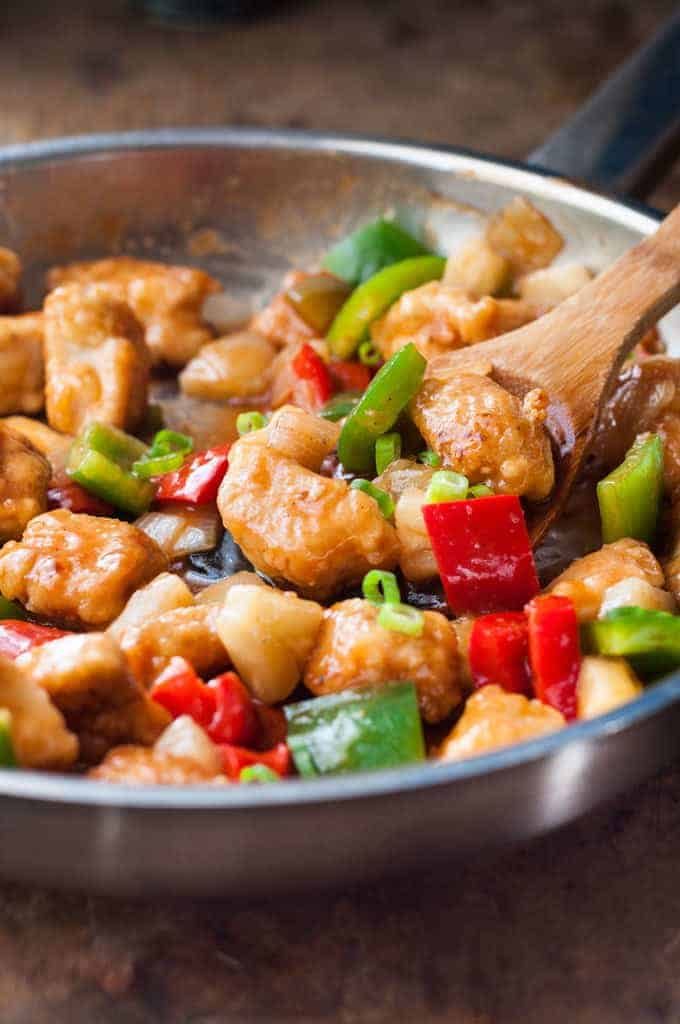
Baked Sweet and Sour Chicken
My oven baked version of Sweet & Sour chicken which is not like most recipes you will find on the internet. My sauce uses less sugar so it’s not overly sweet, the sauce ingredients has a few extra things in it so it really does taste more like restaurant Sweet & Sour sauce, and the chicken is only baked for 20 minutes so it does not dry out (but still lovely and crispy!). The ingredients list for this recipe is longer than most on my site – but it is well worth it!

Ingredients
- 1 lb / 500 g chicken breast (, cut into bite size cubes)
- 1/2 tsp salt
- 1 large egg or 2 small eggs (, lightly beaten (enough to coat chicken))
- 1 cup cornstarch / cornflour (, placed in a large ziplock bag)
- 3 to 5 tbsp oil ((vegetable, canola))
- Oil spray
- 1/2 tbsp oil
- 1 garlic clove
- 1 small onion (, cut into large dice)
- 1/2 red bell pepper (, cut into bite size pieces)
- 1/2 green bell pepper (, cut into bite size pieces)
- 1 can ((8oz/250g) canned pineapple pieces in natural juice. Separate pineapple from juice.)
- 1/2 cup sugar ((white or brown - I use either))
- 1/3 cup apple cider vinegar
- 2 - 3 tbsp pineapple juice ((from the canned pineapple pieces))
- 3 tbsp ketchup ((Australia: tomato sauce))
- 1 tsp Worcestershire sauce ((Note 1))
- 1 tsp soy sauce ((Note 1))
- 1 tsp Oyster Sauce ((Note 1))
- 1/4 tsp salt
- 1 tbsp cornflour / corn starch + 4 tbsp water (, mixed together)
Instructions
- Preheat oven to 200C/390F.
- Place chicken in a bowl, sprinkle with salt then add the egg. Mix to coat all chicken with egg, then drain out excess egg. (Note 2)
- Working a handful at a time, shake excess egg mixture off chicken then place chicken in ziplock bag. When all the chicken is in the bag, seal (trap as much air in it as you can to make a "balloon") and shake well to coat chicken in cornflour. Discard excess cornflour.
- Heat oil in a large skillet on high. Add chicken (in 2 batches if your skillet is not big enough) and cook briefly for 2 minutes, turning, just to make the outside light golden and a bit crispy. The chicken should be raw inside.
- Transfer to baking tray, spray with oil and bake for 15 to 20 minutes until it becomes a little more golden brown and is crispy.
- Sauce
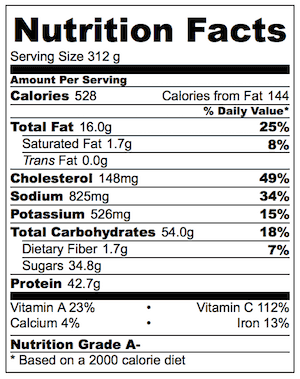
Nutrition Facts
| servingSize | 312 g |
|---|---|
| calories | 528 kcal |
| carbohydrateContent | 54 g |
| proteinContent | 42.7 g |
| fatContent | 16 g |
| saturatedFatContent | 1.7 g |
| cholesterolContent | 148 mg |
| sodiumContent | 825 mg |
| sugarContent | 34.8 g |
Full Recipe & Notes
A Baked Sweet and Sour Chicken recipe that shows you how to make the Chinese takeout favourite Sweet and Sour Chicken in the oven so the chicken is CRISPY but not dried out inside. Coated generously in a sticky sauce with a perfect sweet-sour balance!
I don’t like to shout out from the rooftops “this is the BEST baked Sweet & Sour Chicken!” because who’s to say that theirs is the best? But this is a darn good recipe. And it’s MY favourite way of making Sweet & Sour Chicken in the oven. Here’s why:
Not sickeningly sweet.
It’s made with 1/2 cup of sugar which is still a lot compared to my usual midweek meals. But it is less than the 3/4 to 1 cup that you’ll see in many recipes.
Not eye-squintingly sour.
I don’t know how to properly describe my reaction when I accidentally eat something far too sour! Suffice to say this is tart, not overly sour. 🙂
The Sauce tastes like restaurant sauce.
Many Sweet & Sour Sauce recipes taste like they’re missing “something”. Usually that “something” is either Worcestershire Sauce and/or oyster sauce (sometimes also soy sauce). You can omit one of these but don’t leave out all of them, the sauce will taste very “flat”.
The chicken really is crispy!
The fact is, you will never be able to make chicken in the oven that is truly as crispy as deep fried (except wings – see my recipe for
Truly Crispy Oven Baked Wings
!). But this is pretty darn close.
The chicken is NOT DRY.
I have seen recipes that call for the chicken to be baked for 45 minutes to 1 hour which I find dries out the chicken. I’m really fussy about dry chicken! Mine is baked for 20 minutes – tops. That’s all you need.
Pretty hard to pick what I love more about this – the Sweet & Sour Sauce, or the crispy chicken! The chicken itself is so yum, it’s hard to resist nicking the pieces straight off the baking tray before they even make it to the sauce.
Try to resist! I promise it’s worth the wait. 🙂 –Nagi xPS Oh, the other little thing I think makes quite a difference is using some of the pineapple juice in the can for the sauce. It adds that little touch of fruitiness that I really think makes the sauce similar to Chinese restaurants!


Baked Sweet and Sour Chicken
Author: Nagi | RecipeTin Eats
Prep: 15 minutes mins
Cook: 25 minutes mins
Total: 40 minutes mins
My oven baked version of Sweet & Sour chicken which is not like most recipes you will find on the internet. My sauce uses less sugar so it’s not overly sweet, the sauce ingredients has a few extra things in it so it really does taste more like restaurant Sweet & Sour sauce, and the chicken is only baked for 20 minutes so it does not dry out (but still lovely and crispy!). The ingredients list for this recipe is longer than most on my site – but it is well worth it!
Ingredients
Chicken
- ▢ 1 lb / 500 g chicken breast , cut into bite size cubes
- ▢ 1/2 tsp salt
- ▢ 1 large egg or 2 small eggs , lightly beaten (enough to coat chicken)
- ▢ 1 cup cornstarch / cornflour , placed in a large ziplock bag
- ▢ 3 to 5 tbsp oil (vegetable, canola)
- ▢ Oil spray
Stir Fry
- ▢ 1/2 tbsp oil
- ▢ 1 garlic clove
- ▢ 1 small onion , cut into large dice
- ▢ 1/2 red bell pepper , cut into bite size pieces
- ▢ 1/2 green bell pepper , cut into bite size pieces
- ▢ 1 can (8oz/250g) canned pineapple pieces in natural juice. Separate pineapple from juice.
Sauce
- ▢ 1/2 cup sugar (white or brown – I use either)
- ▢ 1/3 cup apple cider vinegar
- ▢ 2 – 3 tbsp pineapple juice (from the canned pineapple pieces)
- ▢ 3 tbsp ketchup (Australia: tomato sauce)
- ▢ 1 tsp Worcestershire sauce (Note 1)
- ▢ 1 tsp soy sauce (Note 1)
- ▢ 1 tsp Oyster Sauce (Note 1)
- ▢ 1/4 tsp salt
Thickener
- ▢ 1 tbsp cornflour / corn starch + 4 tbsp water , mixed together
Cook ModePrevent screen from sleeping
Instructions
- Preheat oven to 200C/390F.
- Place chicken in a bowl, sprinkle with salt then add the egg. Mix to coat all chicken with egg, then drain out excess egg. (Note 2)
- Working a handful at a time, shake excess egg mixture off chicken then place chicken in ziplock bag. When all the chicken is in the bag, seal (trap as much air in it as you can to make a “balloon”) and shake well to coat chicken in cornflour. Discard excess cornflour.
- Heat oil in a large skillet on high. Add chicken (in 2 batches if your skillet is not big enough) and cook briefly for 2 minutes, turning, just to make the outside light golden and a bit crispy. The chicken should be raw inside.
- Transfer to baking tray, spray with oil and bake for 15 to 20 minutes until it becomes a little more golden brown and is crispy.
Sauce
- Meanwhile, discard oil in the skillet and wipe briefly with paper towels. Reduce heat to medium high and heat 1/2 tbsp oil. Add garlic and sauté for 20 seconds, then add onion and cook for 2 minutes.
- Add bell peppers and cook for 1 minute.
- Add Sauce ingredients. Stir until sugar has dissolved and the sauce begins to bubble.
- Add Thickener. Bring to simmer, stirring constantly. Then cook until it thickens to a syrup consistency – about 3 minutes.
- Stir through pineapple pieces (just to warm) and remove from stove.
- When the chicken is done, add it into the skillet and toss to coat in the sauce.
- Serve immediately with
rice
– or for a low carb, low cal option, try
Cauliflower Rice
! Garnish with scallions if desired.
__Recipe Notes:
1. These 3 ingredients are what makes this sauce more like the Sweet & Sour sauce that is served at Chinese restaurants. They are my “secret ingredients”! You can omit one (substitute with more of one of the others) and it will still taste similar. But please don’t leave out all 3! The sauce will taste quite flat and bland.
2. I just use my hand to stop the chicken from falling out while allowing the excess egg to pour out.****
3. Nutrition assuming 4 servings. Approximately 1 tbsp of oil is discarded so I have taken this into account.
Nutrition Information:
Serving: 312gCalories: 528cal (26%)Carbohydrates: 54g (18%)Protein: 42.7g (85%)Fat: 16g (25%)Saturated Fat: 1.7g (11%)Cholesterol: 148mg (49%)Sodium: 825mg (36%)Potassium: 526mg (15%)Fiber: 1.7g (7%)Sugar: 34.8g (39%)Vitamin A: 1150IU (23%)Vitamin C: 92.4mg (112%)Calcium: 40mg (4%)Iron: 2.3mg (13%)
Did you make this recipe?I love hearing how you went with my recipes! Tag me on Instagram